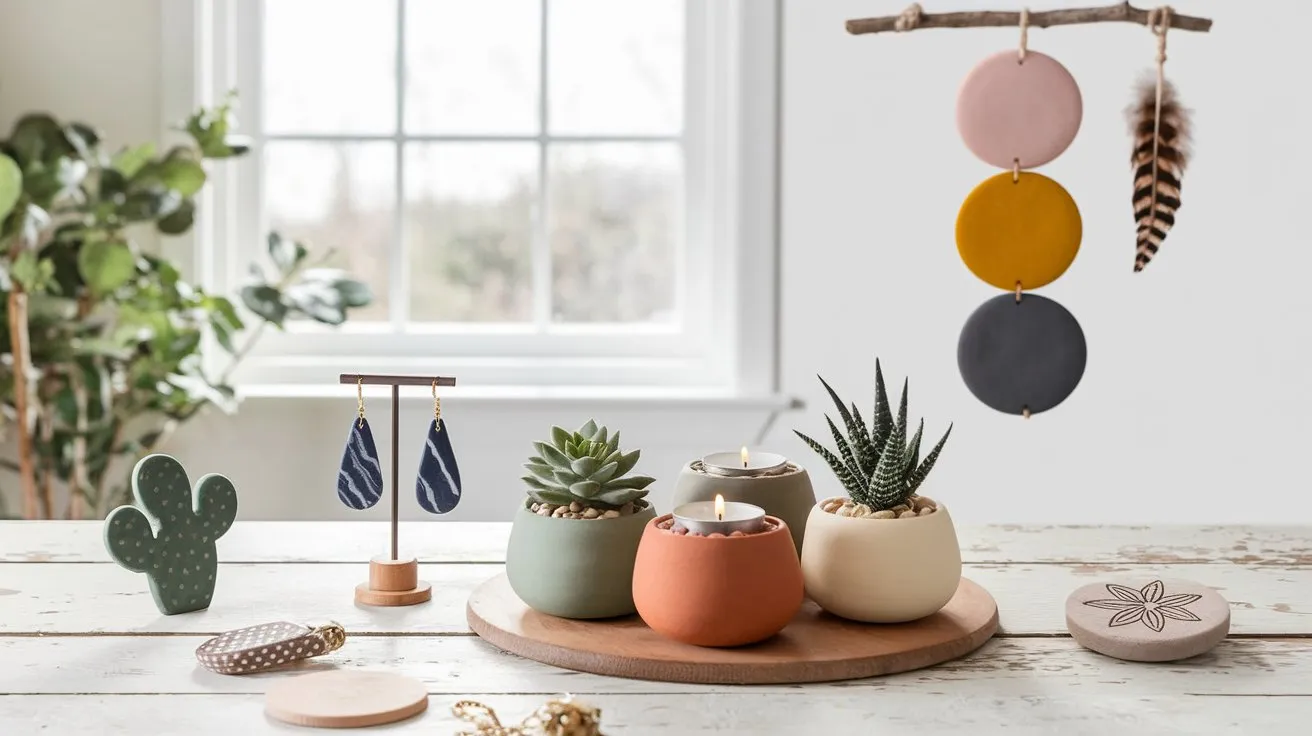
Air dry clay is a fantastic medium for crafters of all levels. It’s easy to work with, doesn’t require a kiln, and dries to a hard, durable finish. Whether you’re looking to create unique home decor, personalized gifts, or simply enjoy a fun creative outlet, air dry clay is the perfect choice. Plus, its versatility and beginner-friendly nature make it an ideal material for diving into a new hobby.
In this article, we’ll explore seven exciting air dry clay projects that you can start right now. From simple pinch pots to stylish wall hangings, there’s something here for everyone. So, grab your clay, and let’s get crafting!
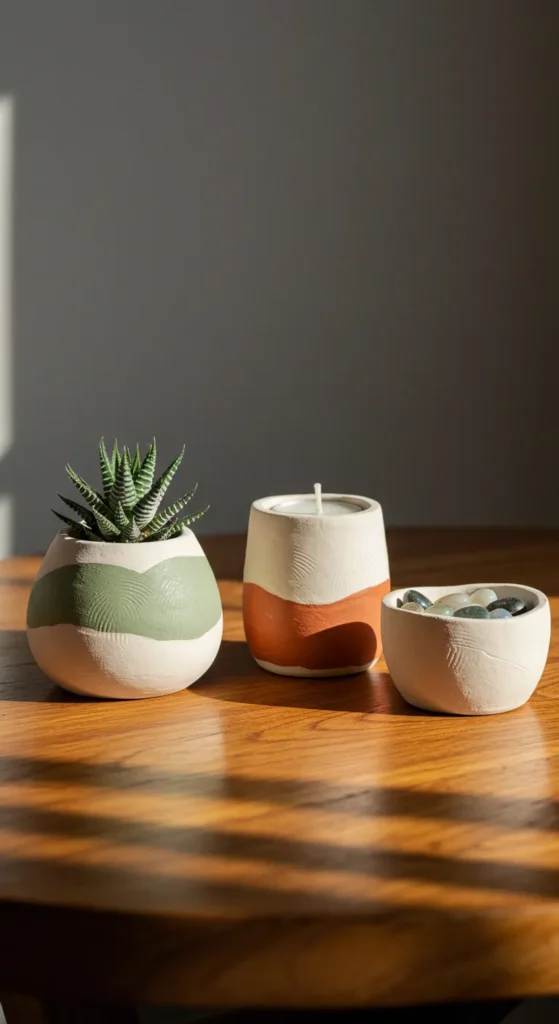
1. Clay Pinch Pots
Pinch pots are an excellent starting point for working with air dry clay. They’re quick and simple to make, and they can serve as small planters, candle holders, or decorative bowls.
- Materials:
- Air dry clay
- Water
- Acrylic paint (optional)
- Steps:
- Knead a small ball of clay to remove air bubbles.
- Press your thumb into the center to create a depression.
- Pinch the clay outward to form the walls of the pot.
- Smooth the surface with a little water.
- Allow it to dry completely (usually 24-48 hours).
- Paint or decorate if desired.
- Tip: Try making a set of pots in different shapes and sizes for a cohesive look.
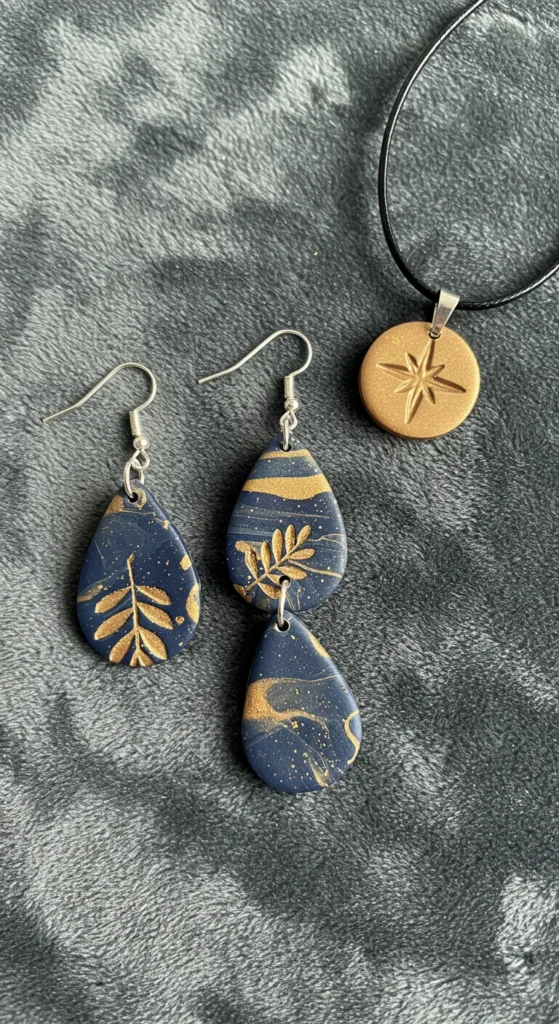
2. Clay Jewelry
Craft your own stylish accessories, like earrings or pendants, using air dry clay. This project lets your creativity shine with endless design possibilities.
- Materials:
- Air dry clay
- Jewelry findings (e.g., earring hooks, chains)
- Acrylic paint or markers
- Steps:
- Roll out the clay to your desired thickness (about 1/8 to 1/4 inch).
- Cut out shapes using cookie cutters or a craft knife.
- Poke holes where the findings will attach.
- Let the pieces dry fully.
- Paint or decorate as you like.
- Attach the jewelry findings.
- Variation: Press leaves, lace, or textured fabric into the clay before it dries for a unique finish.
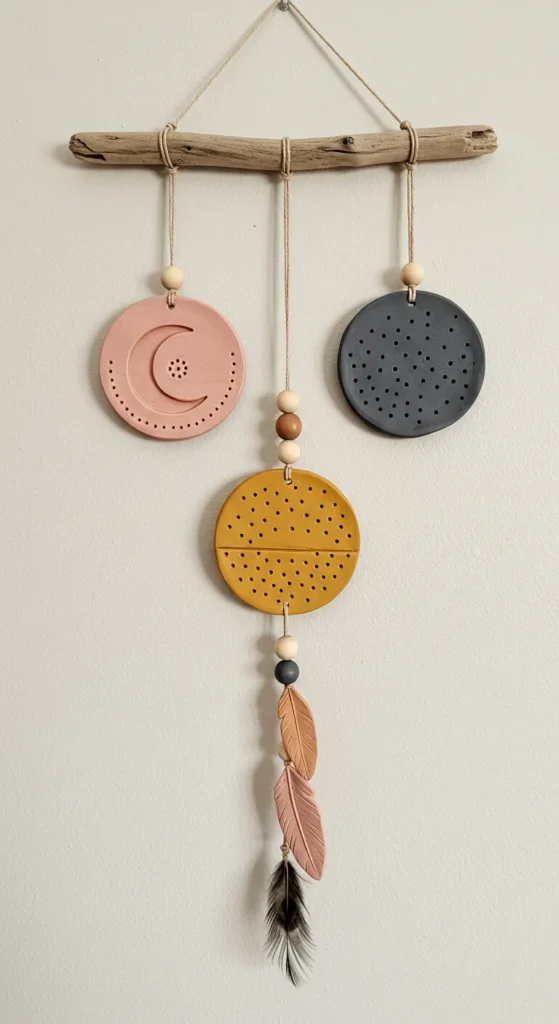
3. Clay Wall Hangings
Bring a boho-chic vibe to your space with custom clay wall hangings. These are easy to make and can be tailored to match your decor.
- Materials:
- Air dry clay
- Rolling pin
- Cookie cutters or a knife
- String or twine
- Steps:
- Roll out the clay to about 1/4 inch thick.
- Cut out shapes (circles, stars, or anything you like).
- Make small holes for hanging.
- Let the pieces dry completely.
- Thread string or twine through the holes and hang.
- Tip: Add feathers, beads, or dried flowers for extra flair.
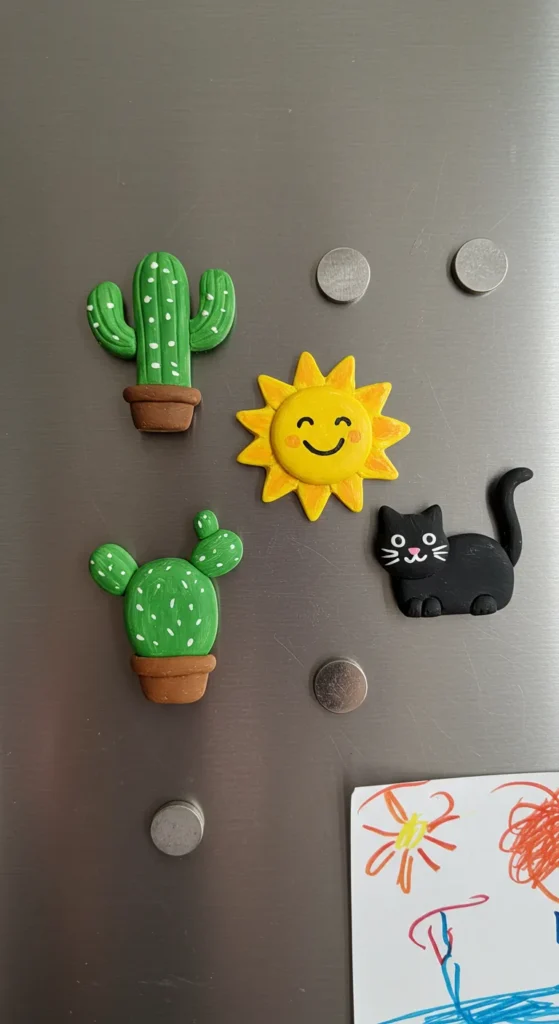
4. Clay Magnets
Personalize your fridge or magnetic board with fun clay magnets. They’re a great small project and make thoughtful gifts.
- Materials:
- Air dry clay
- Small magnets
- Acrylic paint
- Strong glue
- Steps:
- Shape the clay into small designs (think animals, letters, or simple shapes).
- Let them dry fully.
- Paint your designs in bright colors or patterns.
- Glue magnets to the back once the paint dries.
- Variation: Create themed sets, like seasonal shapes for holidays.
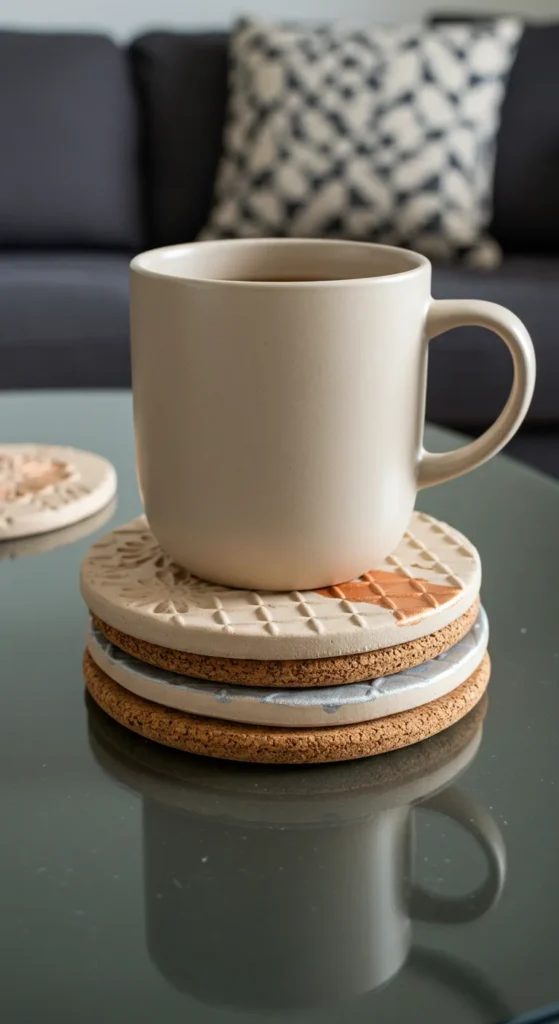
5. Clay Coasters
Protect your surfaces with style by making handmade clay coasters. They’re functional and a great way to experiment with textures.
- Materials:
- Air dry clay
- Rolling pin
- Cork or felt (for backing)
- Acrylic paint or sealant
- Steps:
- Roll out the clay to about 1/4 inch thick.
- Cut out circles or squares (about 4 inches across).
- Add texture or designs if you’d like.
- Let them dry completely.
- Paint or apply a sealant for durability.
- Glue cork or felt to the bottom to prevent scratches.
- Tip: Use stamps or carve patterns into the clay for a custom touch.
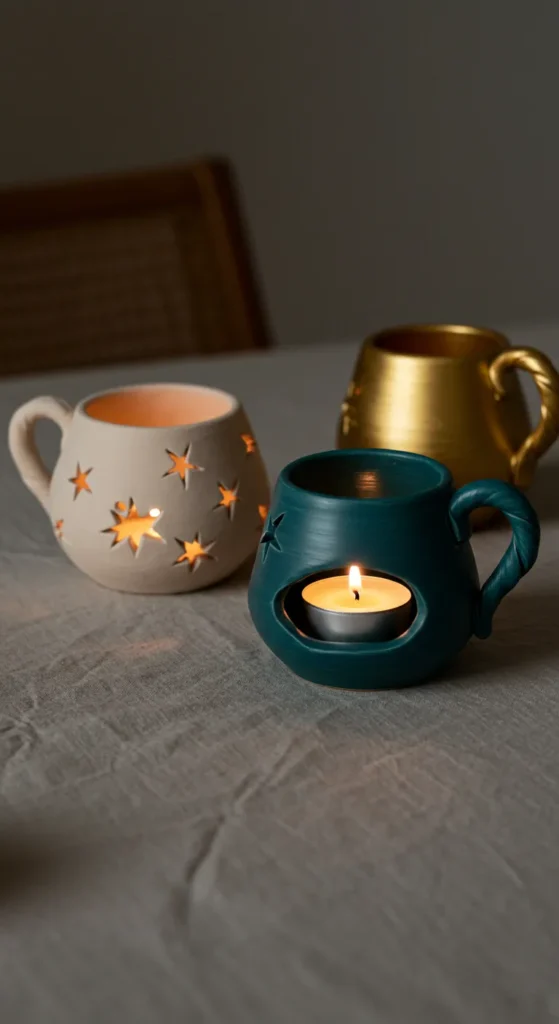
6. Clay Candle Holders
Create a warm, cozy atmosphere with handmade candle holders designed to hold tea lights.
- Materials:
- Air dry clay
- Tea light candles
- Acrylic paint
- Steps:
- Shape the clay into a small cup or base that can hold a tea light securely.
- Add decorative elements like handles, cutouts, or patterns.
- Let it dry fully.
- Paint or leave natural for a minimalist look.
- Variation: Make a set in varying sizes for a tiered centerpiece.
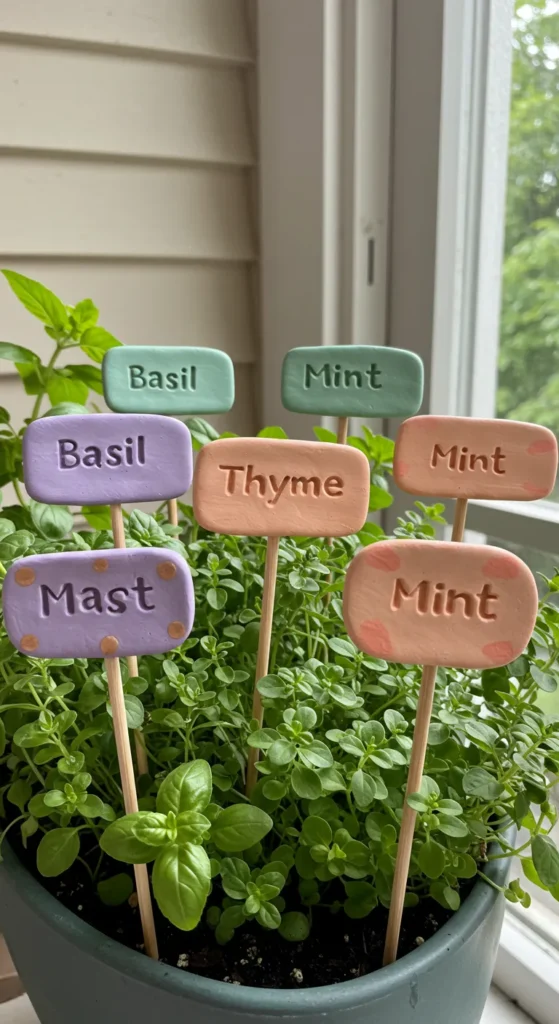
7. Clay Plant Markers
Keep your garden or indoor plants organized with adorable clay plant markers.
- Materials:
- Air dry clay
- Wooden skewers or sticks
- Acrylic paint
- Sealant
- Steps:
- Shape the clay into small tags or flat shapes.
- Write or carve plant names into the clay with a toothpick or tool.
- Let them dry completely.
- Paint the tags for visibility.
- Attach them to skewers or sticks.
- Apply a sealant to protect them outdoors.
- Tip: Use different colors to categorize herbs, flowers, or veggies.
Whether you’re a seasoned crafter or just starting out, these seven air dry clay projects offer a perfect blend of creativity and simplicity—no kiln required! From charming pinch pots to stylish wall hangings, each project invites you to explore your artistic side while creating something beautiful and functional.
If you loved getting your hands dirty with clay, why not dive into more creative adventures? Check out our article on Easy DIY Craft Projects for Instant Creativity for even more ways to spark your imagination and bring handmade charm into your home.
Happy crafting!